
Crash Course on Equalizers: Learning about EQ Curves, Types, and Controls
Hello, what’s up?
This is the first of four equalizer tutorials.This part focuses strictly on the basics. In the next episodes, things will go a lot further.
An equalizer, or EQ, is used to remove or add frequencies from a signal.
It’s one of the most important tools in audio, especially when working with a mix.
At its core, EQ is used to:
- Shape the tonal balance of sounds
- Create separation between individual tracks
- Help elements sit together cleanly in a mix
Even though equalizing may sound very complex, it’s actually not that complicated at all once you break it down.
Let’s start from the beginning.
Why We Use Equalization
There are two main reasons for using EQ:
- Corrective equalizing
- Enhancive equalizing
Corrective EQ is used to remove problem frequencies—things like muddiness, harshness, or boxiness.
Enhancive EQ is used to bring out character, presence, or clarity in a sound.
Both approaches rely on understanding how EQ curves work.
Understanding Equalization Curves
The curve of an equalizer describes how boost or cut is applied across a frequency range.
Despite how complex EQs may look, there are actually only two types of equalization curves.
Shelving Equalizer Curves
A shelving equalizer curve boosts or attenuates frequencies above or below a selected frequency.
There are two shelving types:
- Low-shelving EQ
- High-shelving EQ
Low-Shelving EQ
A low-shelving EQ affects everything below the selected frequency.
- Lowering the gain cuts low frequencies
- Raising the gain boosts low frequencies
High-Shelving EQ
A high-shelving EQ affects everything above the selected frequency.
- Cutting reduces high-frequency content
- Boosting adds brightness and air
Shelving EQs work on entire frequency regions, not just one point.
Bell (Peak / Dip) Equalizer Curves
The second type of EQ curve is the bell-shaped curve, also known as peak/dip EQ.
This type:
- Boosts or attenuates a range of frequencies
- Is centered around a specific center frequency
- Affects that center frequency the most
- Gradually affects surrounding frequencies less
Visually, this creates a bell-shaped curve.
Types of Equalizers
Different EQ designs offer different levels of control. Let’s go through the main ones.
Fixed Frequency Equalizers
A fixed frequency EQ can be:
- Shelving
- Bell-type
But it only offers one control:
- Boost or cut
The frequency itself is fixed—you can’t move it.
Sweeping Equalizers
A sweeping EQ is more flexible.
It offers two controls:
- Frequency
- Gain
You can move the frequency and choose how much you boost or cut, but bandwidth control is still fixed.
Parametric Equalizers
A parametric EQ is one of the most flexible types of equalizers available.
It offers three controls:
- Frequency
- Gain
- Q-value
These are the three functions you’ll normally find on a parametric EQ.
EQ Parameters Explained
Understanding these controls is essential.
Frequency
The frequency control sets:
- The center frequency for bell curves
- The starting frequency for shelving curves
This determines where the EQ is acting.
Q-Value (Bandwidth)
The Q-value controls the bandwidth of the EQ.
Some manufacturers call this “quality,” others call it “bandwidth.”
Technically:
Q = center frequency ÷ bandwidth
What this means in practice:
- Low Q → wide bandwidth
- High Q → narrow bandwidth
This is useful because some EQs only display the Q as a number, while others use symbols to show whether the band is narrow or wide.
Gain (Boost / Cut)
The gain parameter controls how much the selected frequencies are boosted or cut.
Depending on the EQ:
- Boost/cut ranges can go from –24 dB to +24 dB
- Digital EQs usually allow much higher gain ranges than analog EQs
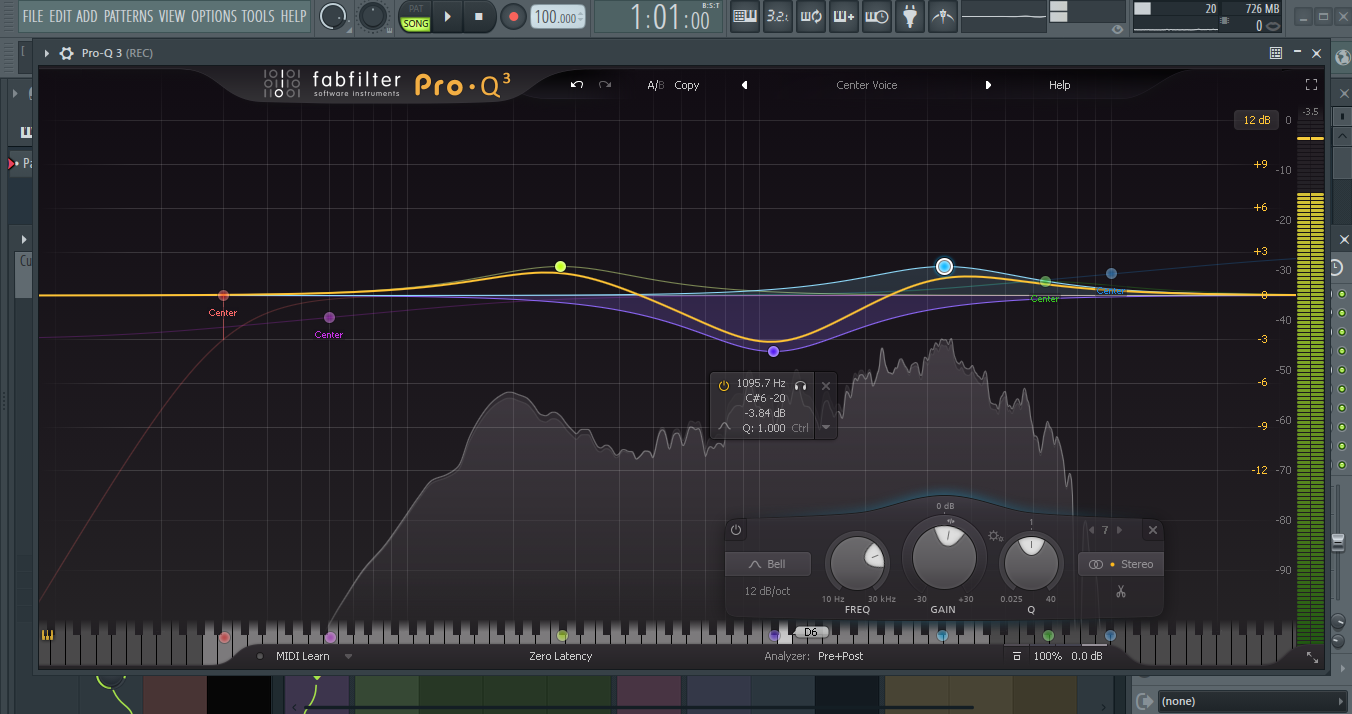
Visualizing EQ in Practice
Looking at an EQ graph helps make this clearer.
- The horizontal axis shows frequency from 20 Hz to 20 kHz
- A dot represents the selected frequency for a band
When you move the frequency control, the dot moves horizontally.
When you adjust gain:
- Lowering gain cuts frequencies
- Raising gain boosts frequencies
With a low-shelving EQ, cutting removes low frequencies, while boosting adds low-end energy.
Hearing the Difference: Bell-Shaped EQ
Using a voice signal makes bell EQ behavior easy to hear.
- Boosting around 400 Hz makes the voice sound boxy
- Boosting around 2 kHz makes it sound more open and defined
Changing the Q-value changes how many frequencies are affected:
- Wide band → more frequencies affected
- Narrow band → fewer frequencies affected
Sweeping a narrow band across the spectrum makes it very clear that only a small range of frequencies is being changed.
The same applies when cutting frequencies instead of boosting.
The Impact of Bandwidth
Bandwidth has a major influence on how EQ affects a signal.
- Narrow bands are precise and focused
- Wide bands have broader tonal impact
You can clearly hear the difference in how much of the signal is altered as the bandwidth changes.
Graphic Equalizers
A graphic equalizer works differently from a parametric EQ.
It offers:
- A series of fixed bell curves
- Each band has a fixed frequency
- Only a gain control is available
These gain controls are usually fader-style sliders.
Because the frequency bands are visible, you can easily visualize the EQ curve, which is why it’s called a graphic EQ.
Standardized Frequency Bands
Graphic EQ frequency bands are standardized according to an ISO norm.
This makes them consistent across different systems.
In comparison:
- Parametric EQs usually have knobs
- Graphic EQs usually have faders
Many software EQs use graphical displays that make EQ curves easier to see than hardware units, though hardware often encourages using your ears more than your eyes.
What’s Coming Next
This tutorial is the first part of a four-part series.
In the next parts:
- Different instruments will be equalized
- EQ will be used to create separation
- Mix cleanup techniques will be demonstrated
Examples will include:
- Separating a kick drum and bass-line
- Balancing instruments and vocals
There will also be comparisons between
- Different equalizers
- Analog vs digital EQs
- Common situations encountered when equalizing
Plenty of interesting material is coming up in the next tutorials.