
Crash Course on Filters: Shaping the Frequency Content of a Signal
Today we’re going to take a look at filters. In the last episode, frequencies were the main focus. Now, the attention shifts to how we actually change the frequency content of a signal.
A filter is used to remove groups of frequencies from a signal. By doing this, we can clean up audio, shape sound creatively, or apply effects that dramatically change how something feels in a mix.
When looking at filters, there are different types that we can run into, and each one serves a specific purpose.
What a Filter Does
At its core, a filter allows certain frequencies to pass through while cutting or removing others. This makes filters one of the most essential tools in audio processing.
A filter is being used to remove groups of frequencies from our signal.
Depending on the type of filter, we can remove:
- Low frequencies
- High frequencies
- A specific band of frequencies
- Multiple narrow bands at once
Each filter type is designed for a particular job.
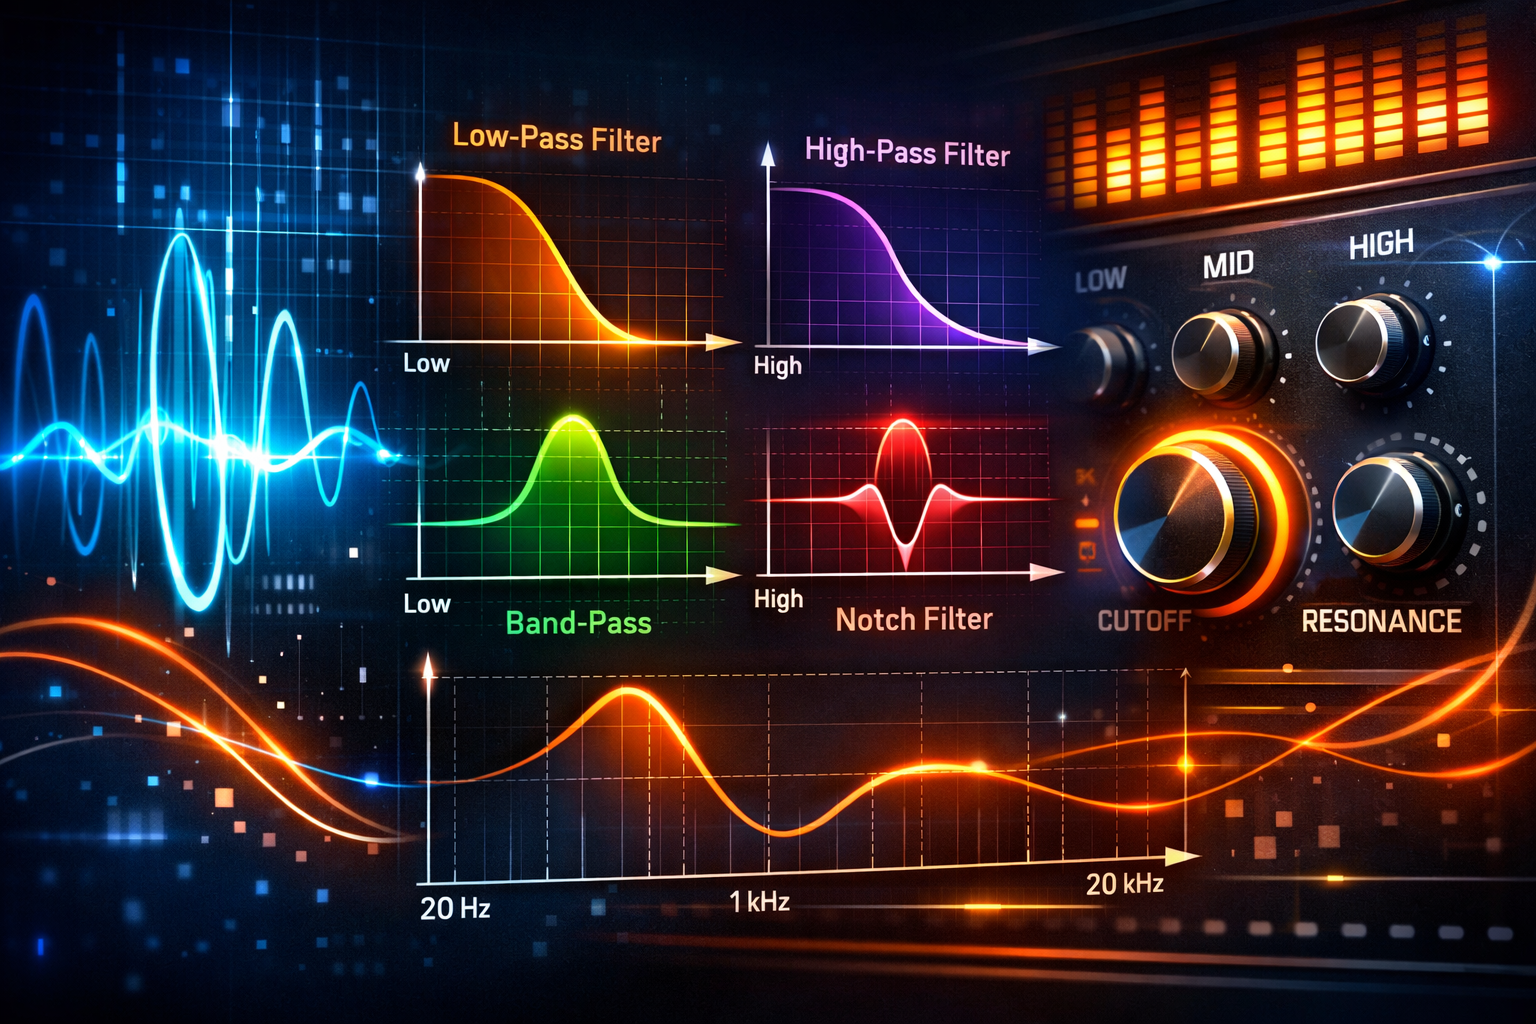
Low-Cut (High-Pass) Filters
The first filter to look at is a low-cut filter, also called a high-pass filter.
A high-pass filter lets through the high frequencies by cutting all the low frequencies.
This type of filter is especially useful when:
- You need to remove a whole bunch of low frequencies
- You want to clean up rumble or unwanted low-end
- You’re using it creatively as an effect
When applied to background music, you can clearly hear the moment where the low frequencies are cut away—and then brought back in again. This contrast makes it a powerful and noticeable tool.
Low-Pass (High-Cut) Filters
Next up is the low-pass filter, also known as a high-cut filter.
This is exactly the opposite of a high-pass filter.
A low-pass filter:
- Lets through the low frequencies
- Removes or cuts the high frequencies
This filter is often used to remove harshness or brightness, but it can also be pretty cool as an effect.
Once applied, you can clearly hear that:
- The high frequencies are being cut away
- Only the low part of the signal remains
This creates a muffled, darker sound that can be very effective depending on the context.
Band-Cut Filters
Then we’ve got the band-cut filter.
A band-cut filter removes a region, or band, of frequencies instead of everything above or below a certain point.
For example:
- If there’s a really annoying frequency around 400 or 500 Hz
- A band-cut filter allows you to remove just that small portion of the spectrum
This makes it extremely useful for fixing specific problems without affecting the rest of the sound.
Band-Pass Filters
A band-pass filter works in the opposite way of a band-cut filter.
It:
- Removes all the low frequencies
- Removes all the high frequencies
- Keeps only a band of frequencies in the middle
This isolates a specific range and removes everything else, which can dramatically change the character of a signal.
Notch Filters
A notch filter is basically a band-cut filter, but with a key difference.
The band is really narrow.
That means:
- It affects a very small group of frequencies
- It’s ideal for removing very specific problem frequencies
Notch filters are often used when precision is more important than broad tonal changes.
Comb Filters
Finally, there’s the comb filter.
A comb filter is:
- A series of really small notch filters
- Placed one after another in a row
Because of the way they look on a frequency graph, they resemble the teeth of a comb.
They basically look like a comb.
This type of filter creates a very distinct and recognizable sound due to its repeating pattern of cuts across the frequency spectrum.
Core Filter Functions and Parameters
Filters don’t just come in different types—they also share common functions and parameters that define how they behave.
Frequency Parameter
Probably the most important parameter is the frequency.
The frequency parameter allows us to set from where the filter should work.
For example:
- With a low-cut filter, the frequency defines from where below frequencies will be cut
Because of this, the frequency setting is usually:
- The first setting applied when inserting a filter
Slope
Next is the slope.
The slope describes the attenuation of frequencies per octave.
Key points about slope:
- Slopes usually increase in steps of 6 dB
- Common values include:
- 6 dB
- 12 dB
- 18 dB
- 24 dB
A slope of 6 dB means:
- For every octave, the attenuation increases by 6 dB
A slope of 24 dB means:
- For every octave, the attenuation increases by 24 dB
- This creates a much steeper slope
A steeper slope:
- Filters more aggressively
- Produces a stronger effect
Most filters allow you to choose the attenuation per octave, but these values are typically fixed in multiples of six.
Dual Frequency Settings for Band Filters
When working with:
- Band-pass filters
- Band-cut filters
You usually have two frequency selections:
- One for each side of the filter
This allows you to define exactly which range of frequencies is being affected.
Resonance
Another important function is resonance.
Resonance is:
- A small boost at the edges of the frequency selection
This boost enhances the sound of a filter sweep as the filter moves through the frequency spectrum.
When performing a sweep:
- Without resonance, the movement is smoother and less pronounced
- With increased resonance, the edge becomes sharper and much more noticeable
You could really hear that sharp edge when the resonance was increased.
This makes resonance especially useful when you want the sweep to stand out clearly in a mix.
What This Covers
This tutorial covers the basics of filters:
- The main types of filters
- What each one does
- The key parameters that control them
In the next tutorial, the focus shifts to a practical session, where filters are actually used in a project with more examples. After that, the discussion moves on to equalizers.