
Crash Course on Insert Effects and Auxiliary Sends in Mixing.
Introduction to Insert Effects and Auxiliary Sends
Hey, what’s up—Welcome, we’re diving into another focused tutorial. This time, the spotlight is on the use of insert effects and auxiliary sends.
Before deciding which one to choose in a mix, it’s essential to understand what insert effects and auxiliary sends actually do, how they behave in the signal path, and why they exist in both analog and digital environments.
To make that clear, everything starts with signal flow.
Signal Flow and the Insert Point
Normally, you’ll find one insert point per channel on a mixing console.
On an analog console, the insert point is a physical interruption in the signal path.
The signal literally leaves the channel strip, exits the console, runs through an external processor, and then comes back.
Because of this, an insert is not just a routing option—it’s a break in the signal path.
What Inserts Are Used For
Inserts are designed to run the entire signal of a channel through an external processor.
For example:
- A compressor
- A gate
- An equalizer
When you use an insert, 100% of the channel’s signal is processed.
Insert Send and Insert Return Explained
In the analog world, inserts consist of two parts:
- Insert Send – the output leaving the channel
- Insert Return – the input bringing the signal back
A simple way to remember it:
You send the signal to the processor, and you return it to the console after processing.
Physical Connections on Consoles
Different consoles handle inserts differently:
- Higher-end consoles often provide separate connectors for send and return on each channel
- Other mixers combine send and return into one physical connector to save space and cost
In those cases, a Y-cable is used.
How a Y-Cable Works
- Tip → Insert Send
- Ring → Insert Return
These cables are soldered specifically to split the signal correctly over a single connector.
Using Multiple Insert Effects on One Channel
Using more than one insert effect on a single channel is straightforward.
Here’s how the signal chain works:
- The signal leaves the channel via the insert send
- It goes into the first processor (for example, a gate)
- The output of that processor feeds the next processor
- This continues through the chain
- The output of the last processor returns to the console via the insert return
This method allows you to insert multiple processors on a single channel while maintaining full signal control.
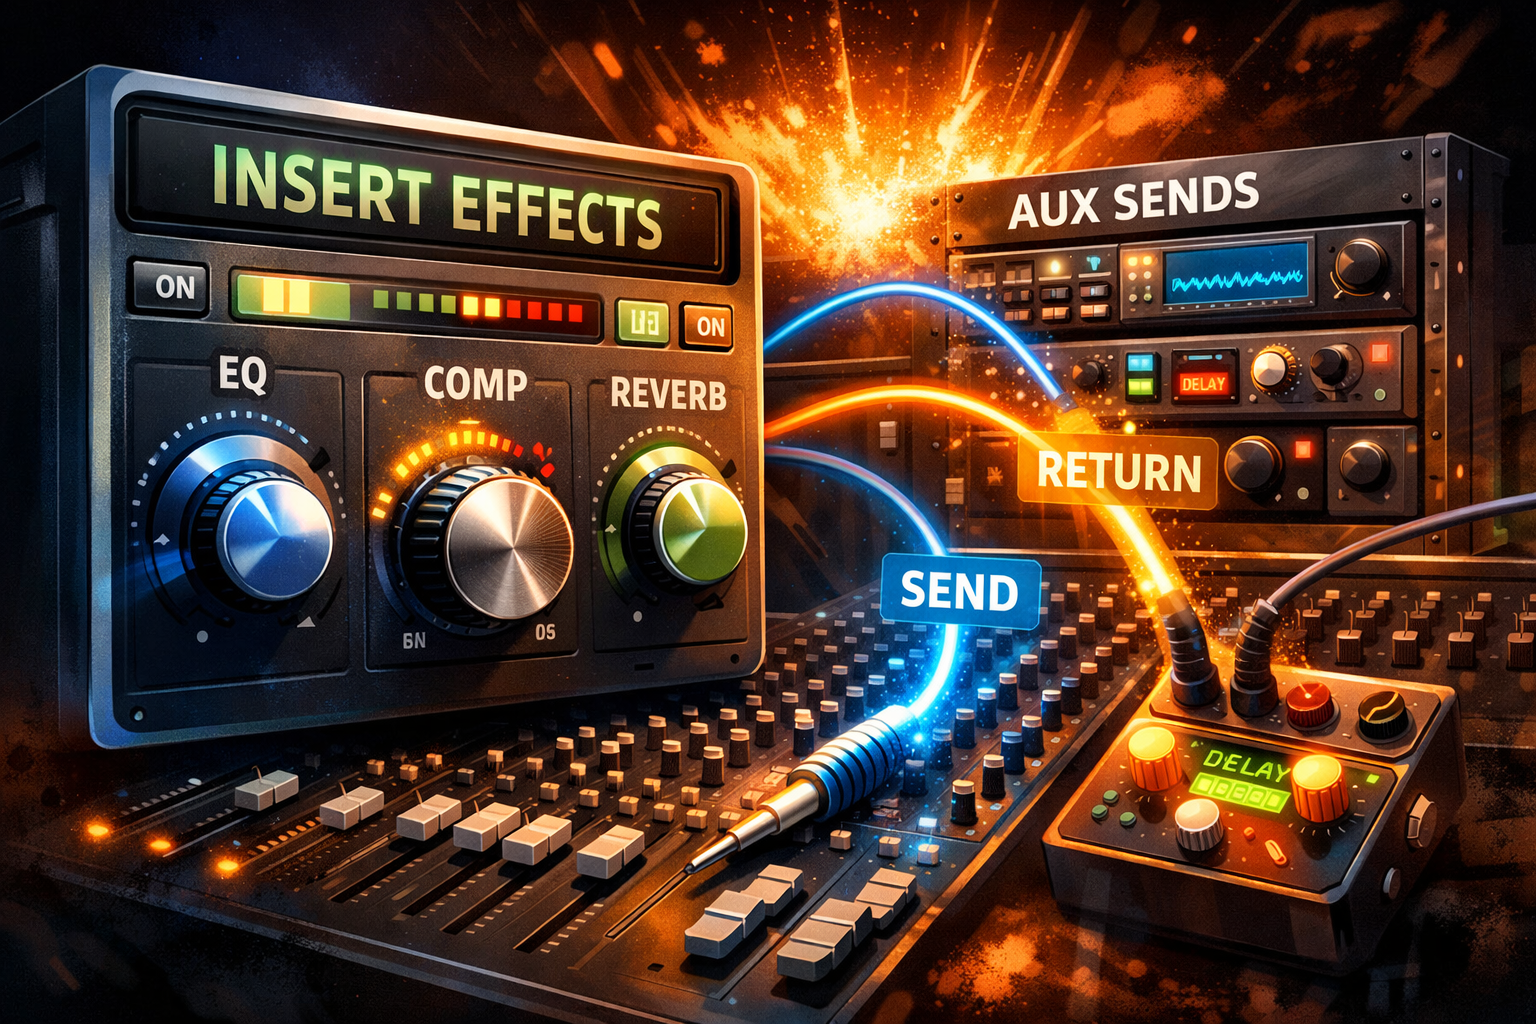
What Is an Auxiliary Send?
An auxiliary send, or aux send, works differently.
Instead of breaking the signal path, it sends only a portion of the signal from a channel to an auxiliary bus.
The auxiliary bus can be thought of as a horizontal signal path across the console.
How Aux Sends Work
- You choose how much of each channel is sent to the auxiliary
- Multiple channels can feed the same auxiliary bus
- The auxiliary bus output is usually a physical output on the console
From there, the signal can be routed to an external processor—such as a reverb unit.
Returning the Auxiliary Signal
Once the signal has been processed:
- The output of the effect processor is sent back into the console
- This can be done through:
- A group return
- Or two spare channels (for stereo effects)
This setup keeps the processed signal separate from the original channel.
Insert Effects vs Auxiliary Sends: When to Use Each
Choosing between inserts and auxiliary sends depends entirely on how the effect should behave in the mix.
When to Use Insert Effects
Insert effects are ideal when the processing should affect the entire signal of one specific channel.
Typical use cases include:
- Compression
- Gating
- Equalizing
- Channel-specific modulation effects (like chorus)
If the effect should shape the whole sound of a single channel, an insert is the right choice.
When to Use Auxiliary Sends
Auxiliary sends are perfect when the same effect needs to be shared across multiple channels.
Common aux-based effects include:
- Reverb
- Delay
- Echo
Instead of duplicating the effect on every channel, you:
- Keep the original signal unchanged
- Blend in the processed signal separately
Wet and Dry Signal Control
One major advantage of auxiliary sends is wet/dry balance.
- Dry → the unaffected original signal
- Wet → the processed signal
Because only a portion of the signal is sent to the effect processor, you can blend the effect into the mix rather than replacing the original sound.
This level of control is one of the main reasons aux sends are preferred for time-based effects.
Typical Insert Effects
Insert effects usually include processors that are meant to work inline with the signal:
- Gates
- Equalizers
- Compressors
- Dynamic shapers (such as envelope shapers)
- Sometimes modulation effects like:
- Chorus
- Flanger
- Phaser
In many situations, these effects are intended to process just one channel, which is why inserts are commonly used.
Typical Auxiliary Send Effects
Auxiliary sends are traditionally used for effects like:
- Reverb
- Delay
This approach dates back to the early days of analog studios.
Reverb units were expensive, and studios didn’t have many of them available.
Because of this:
- You couldn’t insert reverb on every channel
- Aux sends allowed one reverb unit to be shared across many tracks
Why Auxiliary Sends Still Matter in Digital Mixing
Even in modern software mixers, auxiliary sends remain important.
Reverb plugins:
- Consume a lot of CPU or DSP power
- Can quickly overload a system if inserted on every channel
Using auxiliary sends for reverbs:
- Is more efficient
- Reflects the same logic used in analog workflows
- Helps maintain system performance
Managing Hardware with Patch Bays
Using a lot of outboard gear comes with a practical challenge: cabling.
There can be:
- Many inputs
- Many outputs
- A lot of time spent climbing behind the desk
This is where a patch bay becomes essential.
Why Use a Patch Bay
- All studio inputs and outputs are hardwired to the back
- Connections are made from the front panel
- No need to physically reconnect gear behind the desk
This setup makes routing inserts and auxiliaries faster, cleaner, and more flexible.
Inserts and Aux Sends in Digital Environments
Although much of this discussion comes from an analog perspective, the principles are exactly the same in digital systems.
In software mixers:
- Plugins function as digital inserts
- Auxiliary channels are created virtually
- Signals are sent to auxes just like on a physical console
Whether you’re working in the box or with analog gear, the same signal flow concepts apply.
Even hybrid setups—combining digital and analog tools—follow these exact rules.